Enamelling a necklace! Would you like to learn how? I did, it’s not that hard.
I made this beautiful, complicated pendant in a practical class at Art in Action. I went into the class not knowing a thing about enamelling techniques and came out wearing this lovely piece of original wearable art and best of all, I made it myself and now I know how to enamel.
I’m not suggesting that we all run out and buy these supplies for enamelled jewellery making and go for it from my small demonstration, oh no! And I do think a small course may be very helpful to some people, while others could pick up on this right away by watching YouTube videos and such, but if you ever wanted to know a little bit more about it, then here is how I did it and it’s not that hard. 🙂
Let me take you thru the steps:
There are a very few tools one needs for this process.
Actually, the only tools I used were the fine strainer, the tweezers and a pop bottle cap. Apart from those few tools, one needs supplies.
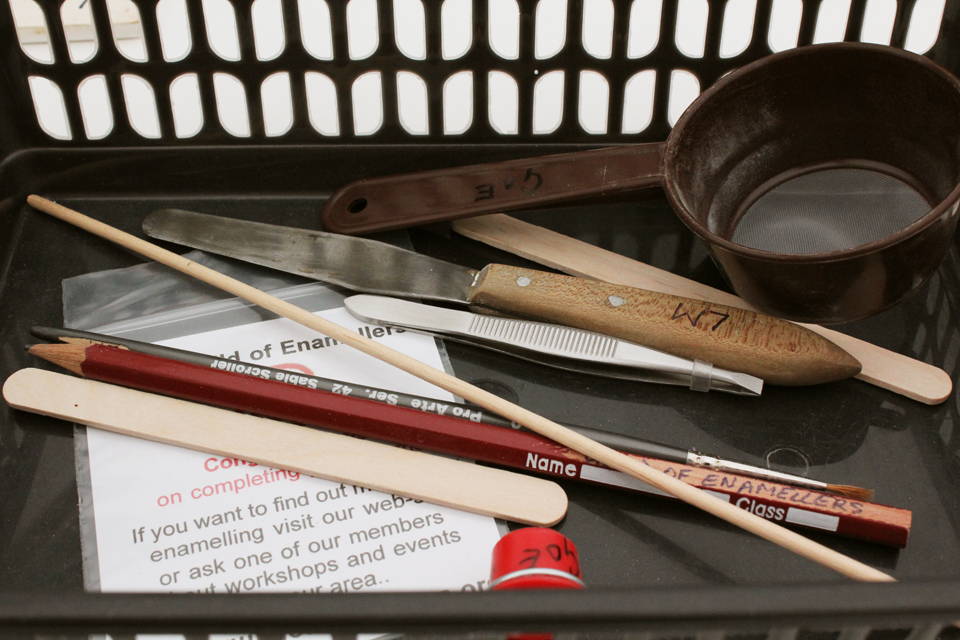
The supplies are: A small kiln, or access to a small kiln, a metal pinwheel shaped holder for holding the piece while it goes into the kiln, a long fork to slide the pinwheel into the kiln and an old ceramic tile to put the very hot product down on.
Some copper shapes, (you can enamel silver shapes too but starting with copper is supposed to be much easier), and some crushed glass enamelling powders. (These powders go a long, long way)
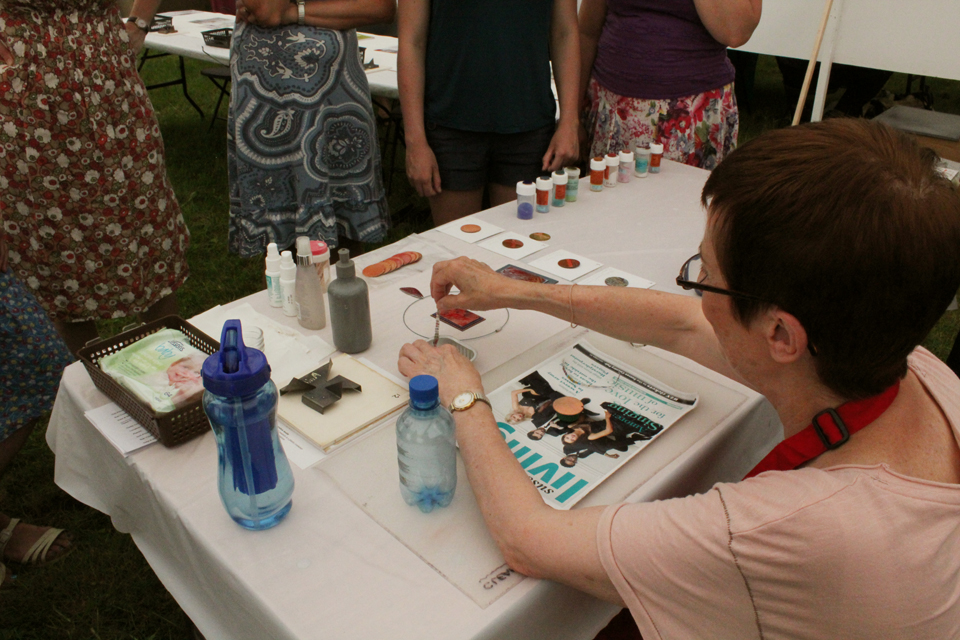
Here is my lovely teacher, Bonnie Mackintosh, from the Guild of Enamellers giving a demonstration.
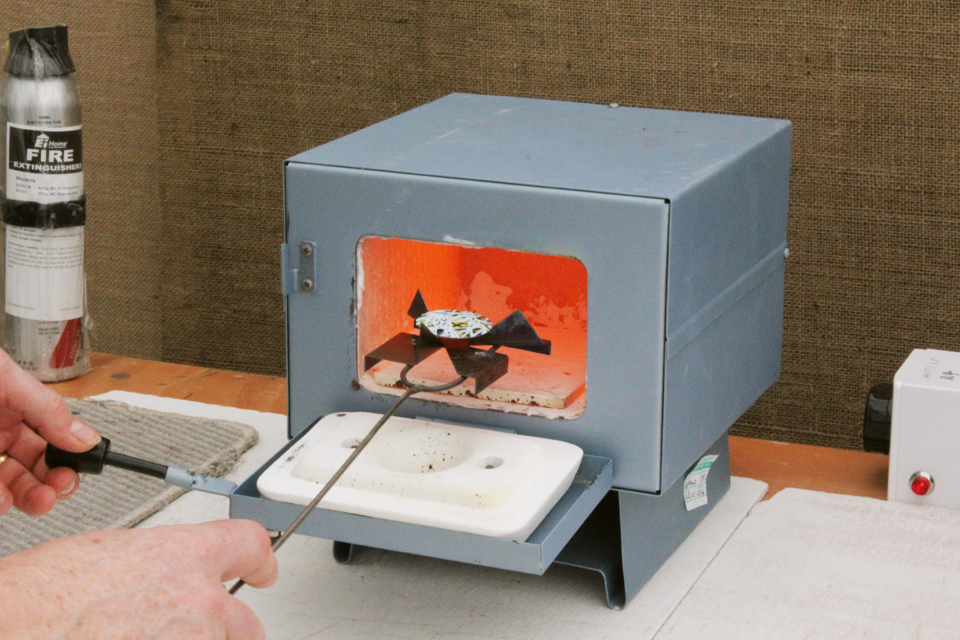
The first step for me was to take my copper disk, place it on the upside down bottle cap, and chose a base colour. Then I ripped up a bit of newsprint and wet it down and placed a couple of pieces on the disc. I chose a deep cobalt blue as the first layer, sieved a small amount on the disc and lifted the wet paper off from under the blue. Then the disc was placed on the pinwheel holder and fired in the kiln for a minute or two. Apparently it is better to underfire rather than overfire and each substance has its own time frame. (This might be a case of a bit of experimentation)
When the disc was cool enough I chose a funny sort of plastic spatula as my next textured layer. I lay the spatula on my disc and used the comb edge of the spatula as a feature. Then I sieved a bright yellow-green pattern thru it and again it was put into the kiln for a minute or two. (The good thing about these powders is that they are dry and if you don’t like the pattern you’ve sieved, or if something goes wrong, then you can simply shake the powder off the disc onto a piece of paper and start the pattern again.)

Here is my jewel after two firings. You can still see the copper thru the blue, thru the yellow-green.
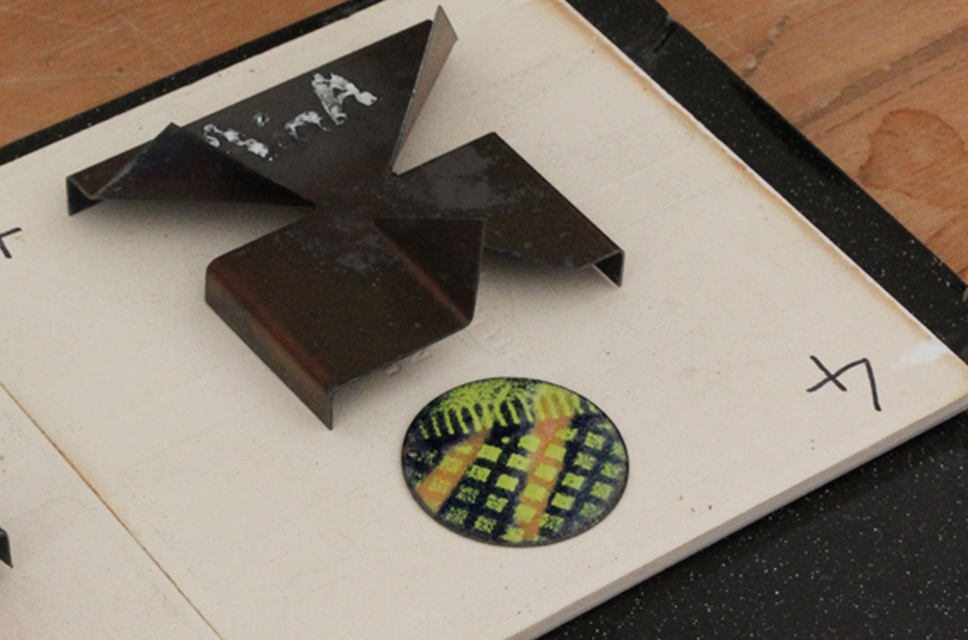
For my next layer I chose a very pale blue and screened that thru a fine stencil of leaves. I put the disk on the bottle cap and placed the stencil on top, put some powder on the side of the stencil and screened it on by moving the powder over the stencil using a piece of card. Again the disc got fired in the kiln.
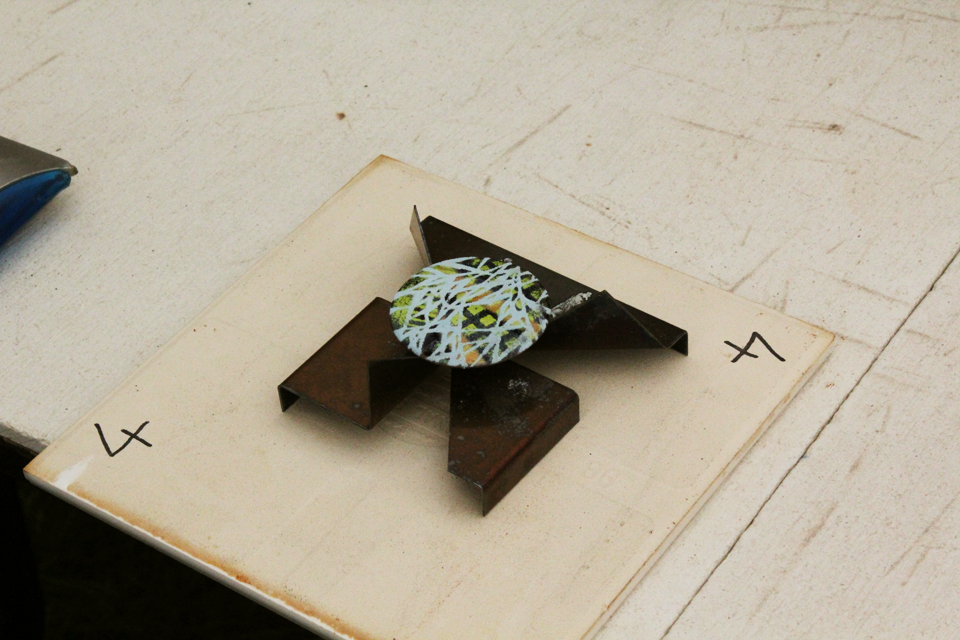
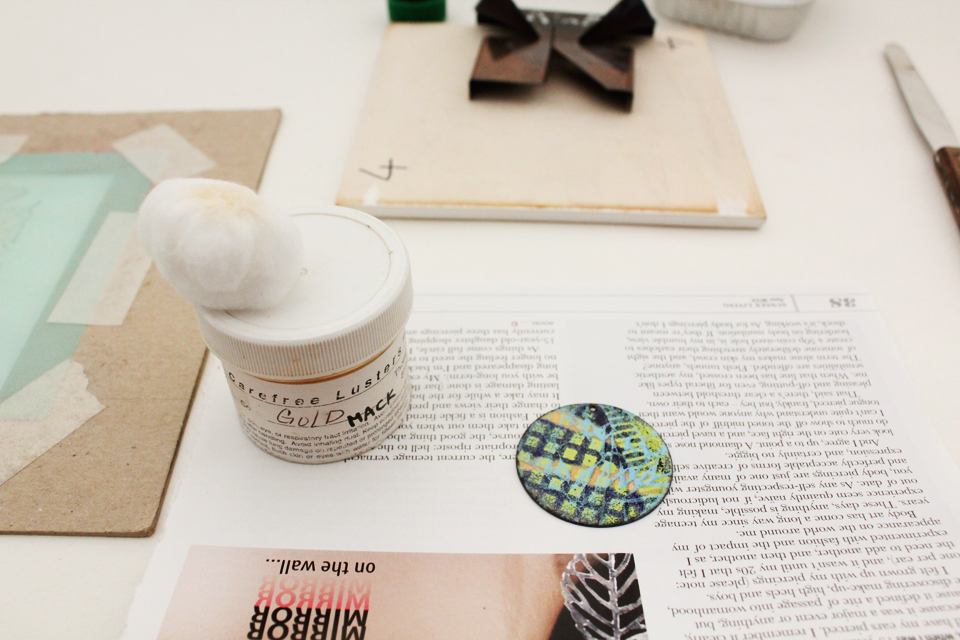
Here is the disc after the third layer before the final one. For the final layer I chose a gold mica based powder which just gave my jewel a shimmer. This was dabbed on thru a stencil of flowers using a cotton ball. You can see the stencil on the left side. Honestly, you can use anything as a stencil. Some people found great results with a hair net!
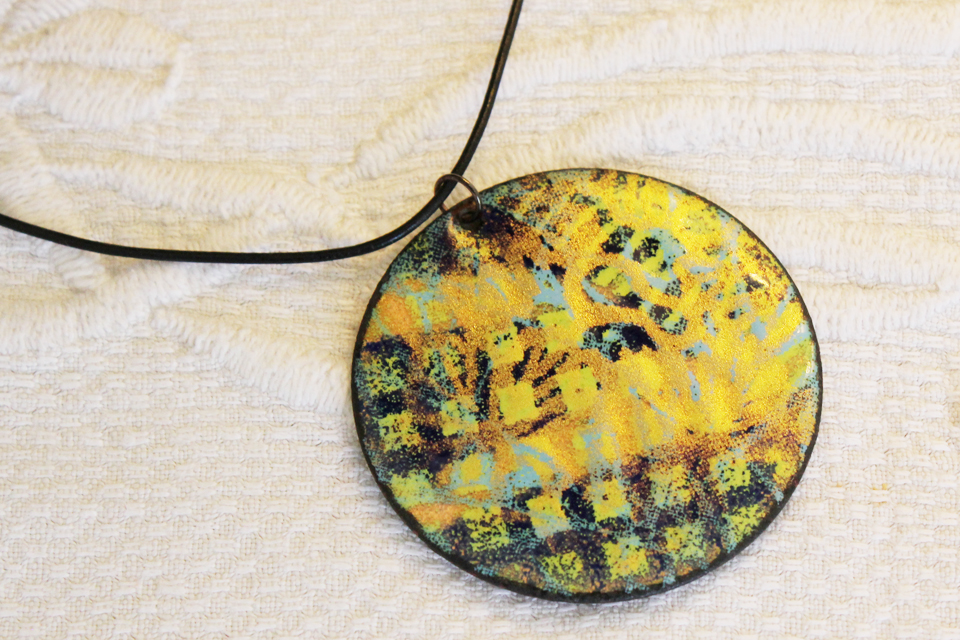
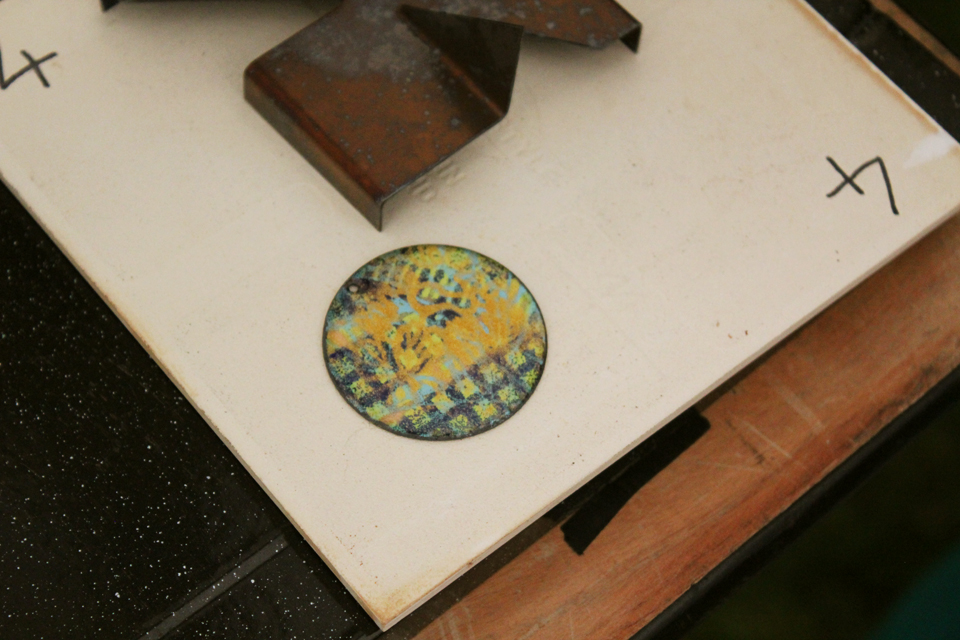
Here is the disc after the fourth firing.
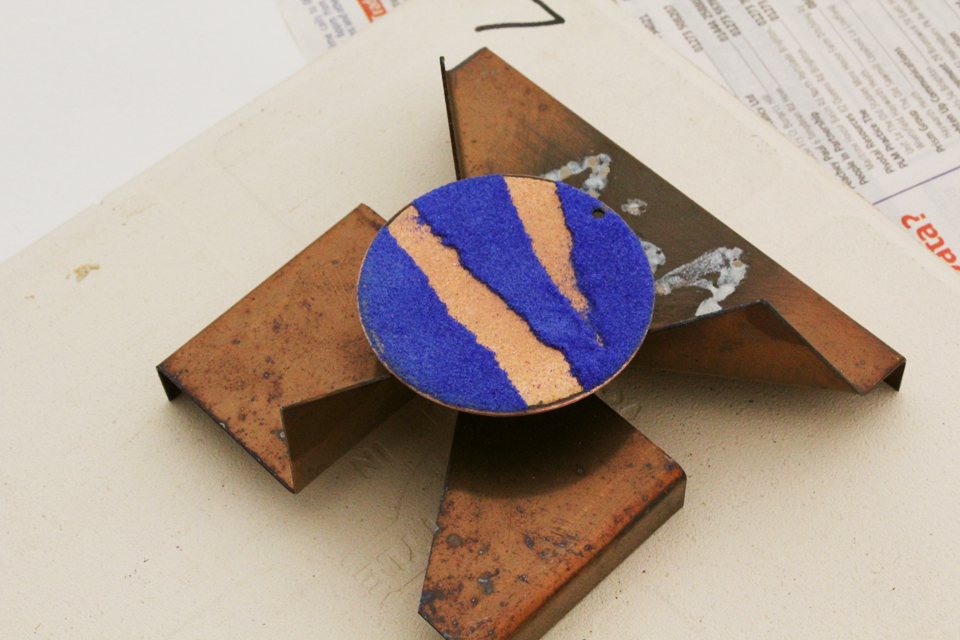
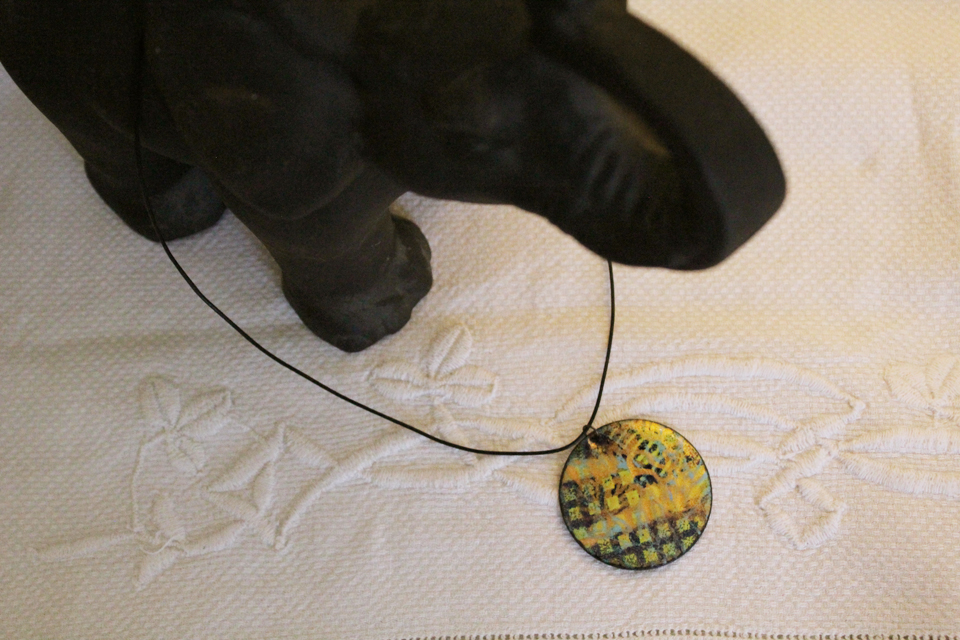
And here is my new jewel on a jump ring and leather strap. I’ve been wearing it for days. I love looking into the rich depths.
So if you’ve been wondering, give this a try. At best you might find the start of a wonderful new business, at worst you might make yourself a lovely piece of original wearable art. 🙂


Becca
I love this, V! How pretty. 😉
Veronica
Thanks Becca. If you have a chance somewhere, give it a try. 🙂
Sara v
Your talent just keeps increasing!! 🙂
Veronica
Aw, thank you Sara. Now I want to enamel lovely things for everyday use like little spoons and jewelled boxes. 🙂
michellepond
Another beautiful creation, Veronica.
Veronica
🙂 Thank you Michelle.
Daryl
its beautiful … i was reading along and kept thinking how does one decide on a color or pattern .. it would have me sitting hours just agonizing over what to do … brava to you!!!!!!
Veronica
Me too Daryl! I just considered having only about 1.5 hours to learn and then having the possibility of making as many enamelled things as I ever wanted to as soon as I figured out how, I just went for a limited palette. 🙂
joypureandsimple
Oh Veronica, I have been spending the morning (in my dressing gown still) catching up with all the lovely things you have been doing these past few weeks! I wish Art in Action would come to Wales. Enameling is something I would love to try and your necklace is so lovely. Your prints, especially the final seed head lino print is gorgeous – also something I would love to get around to doing!!
Keep happy and busy with all this gorgeous Summer sunshine (who would have believed we would finally have a Summer?)
xx
Veronica
Joanne, that’s so sweet, thank you. 🙂 Isn’t it wonderful to actually have this summer? I remember being so excited to wear my summer dresses last year and spending the whole summer in jeans and sweaters! Oh I wish you could have come to A in A with me; we would have had so much fun. I’m lucky that it was in Oxfordshire, because I’m not sure I would have survived the drive out further, especially with jet-lag, (either that or the other drivers wouldn’t have survived me!) 🙂