Practical class: Medieval Manuscript Illumination
You know, I’ve always loved that glowing, golden Medieval manuscript illumination. Each time I’m at a museum I search them out. Something about the illuminated letters just makes my heart sing. Old botanical illustrations or old maps do that for me too. You know, huge books with torn pages and brown stains containing precious paintings.
Have a look at this 15C book page:

I was thrilled to get into the Medieval manuscript decoration class, not only because it was something I had never done before, but also because here was my chance to learn about this from instructor Helen White, a master artist in illuminated manuscripts, with an amazing three decade long knowledge base.
The old Medieval artists used powdered earth pigments and real gold or silver, and I would have loved to mix my own pigments and use real precious gold leaf, but, again, this practical class was only 1.5 hour long, so had to settle for coloured card stock and metal based gold gouache paint from Winsor & Newton.
So, if you’d like to have a go at making yourself an illuminated letter like I did, then gather your materials, you will need:
Tracing paper
coloured card stock
gold gouache paint
white gouache paint
a hard, precise pencil, (I had an H)
black ink pen
a different colour to you card stock pencil or paint
two very small, very precise paintbrushes
ruler
Putting this letter together was a bit like figuring out Celtic knots. Once someone shows you how, it’s really easy.
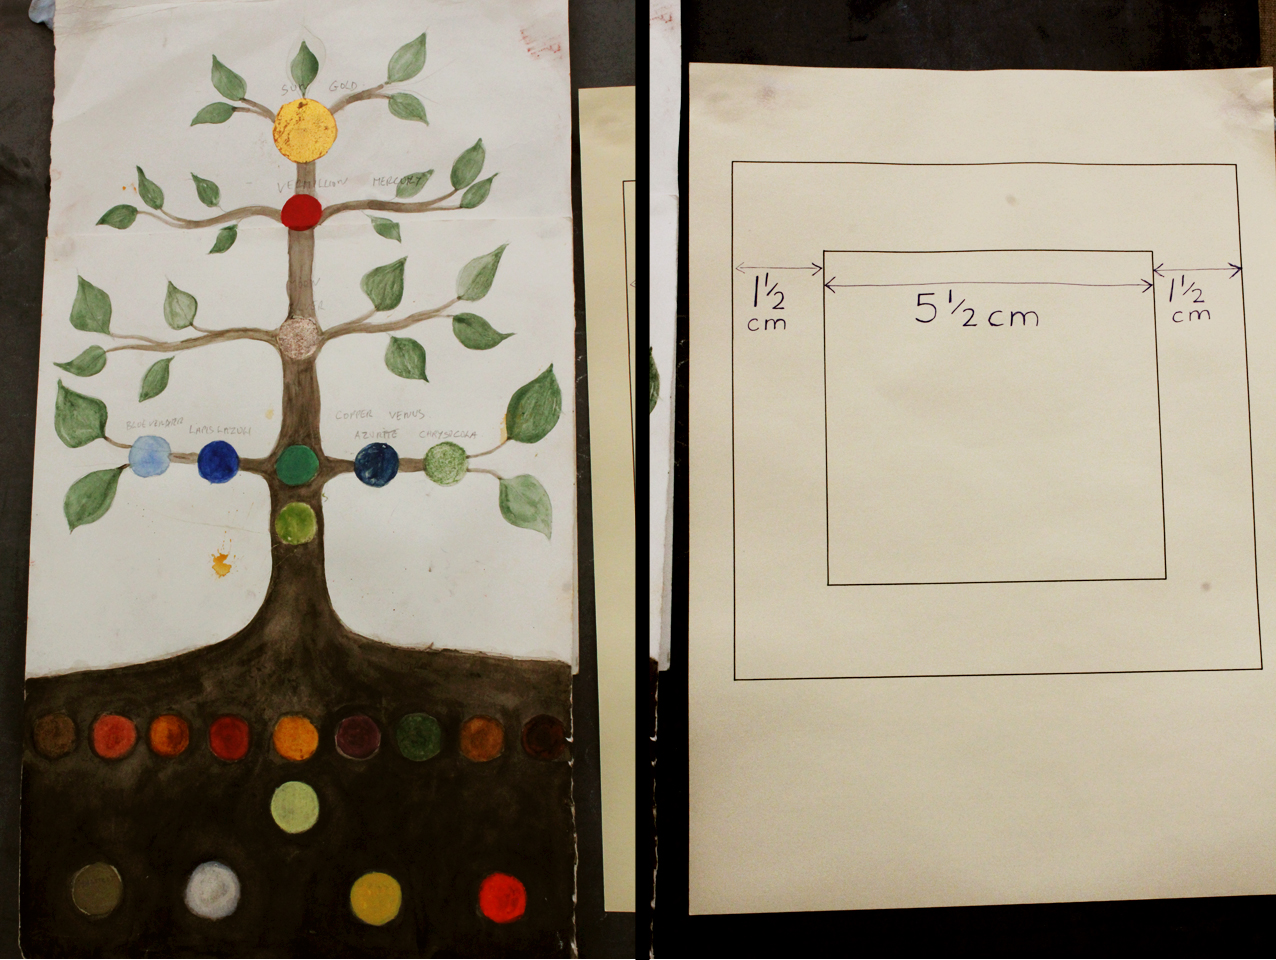
Start with a square of coloured paper. The dimensions of the square I used are in the image above. The letter will sit in the middle of the square, so pick your letter first and them maybe cut your square.
I’m not sure what to advise you for the letter as we were given a printed page with the correct sized font, but for my next adventure, I’ll design the letter myself. Maybe you could have a look on line for a template or write to Helen; she might send you one.
But once you have a font, trace the letter on some tracing paper with a precise, sharp pencil, flip the tracing paper over and trace the letter to the back.
Now put the tracing paper on to the front of your card and go over it again tracing the pencil lead onto the card. I think that, except for an “I”, “T” or an “O”, you just can’t measure the middle and have to eyeball it, but it’s such a precise little painting that you’ll probably get it spot on in that space.
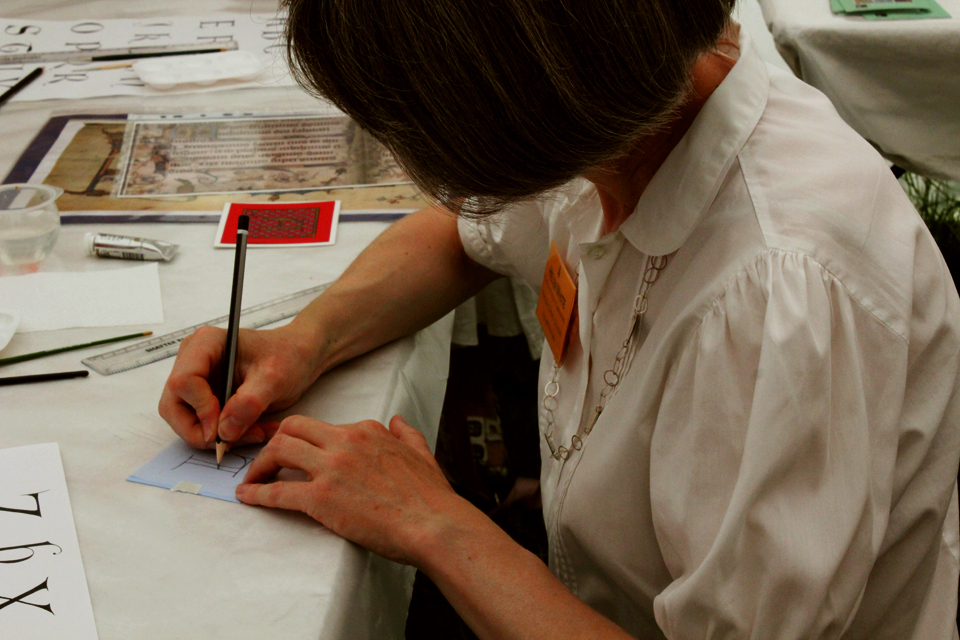
Here is a breakdown of the steps with Helen’s demonstration, but I’ll take you thru them with my piece just below.
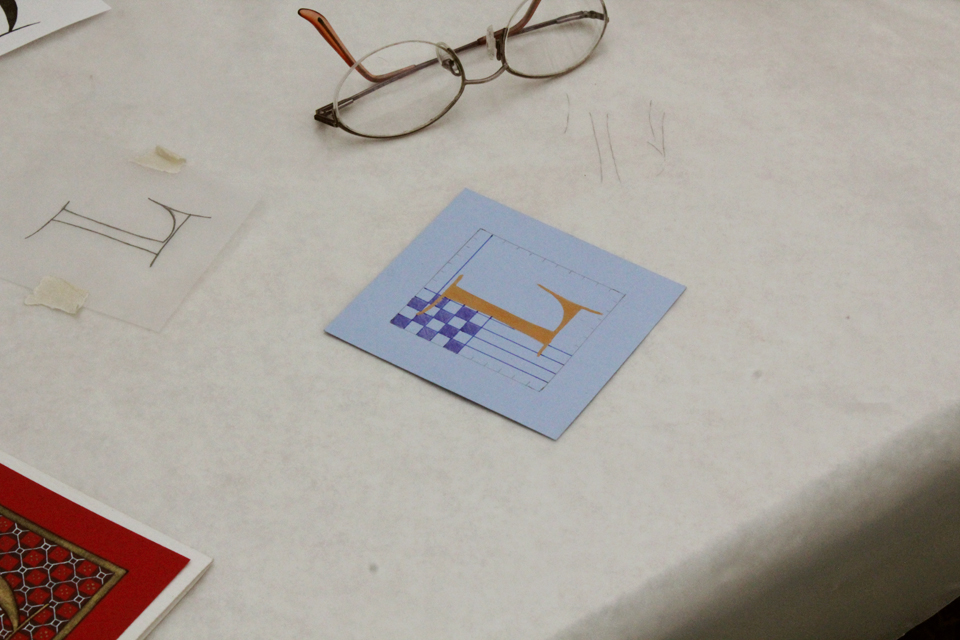
Measure the central square, either according to the diagram above or according to your own wishes and transfer the pencil letter to it.
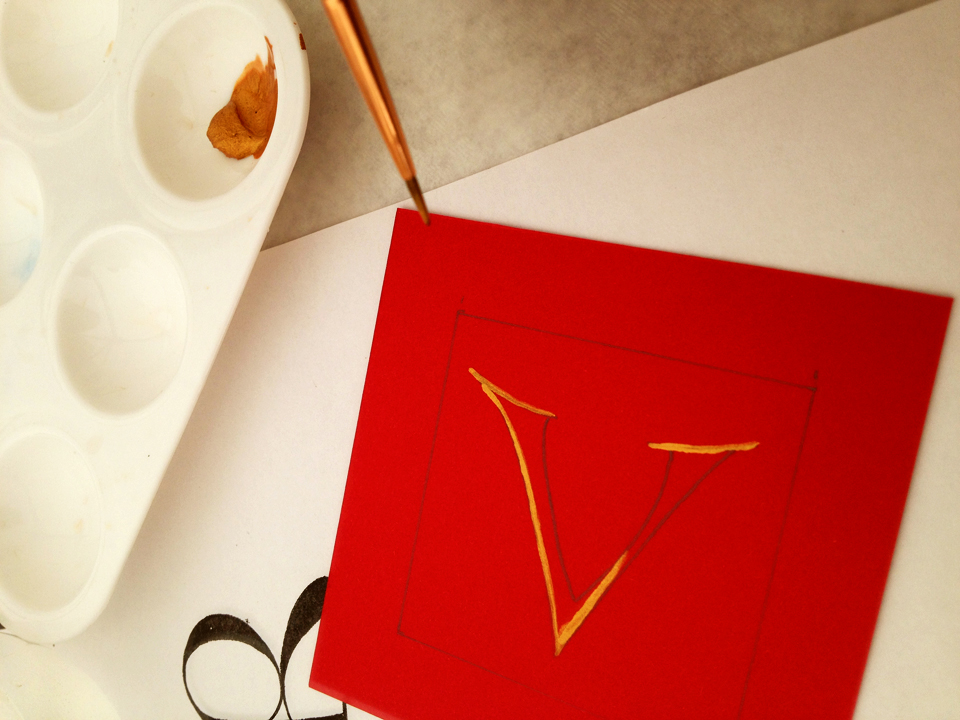
Here, if you had more time and supplies, you could use size and gold leaf, but I used gold paint. Outline the letter first and fill it in later. I know that I’m not a precise painter and so, to keep it extremely precise, I had to go slowly. If you are using a gold size and leaf, I would suggest leaving it till the end to apply; just draw the pencil letter on the card so you can do the decorating around it.
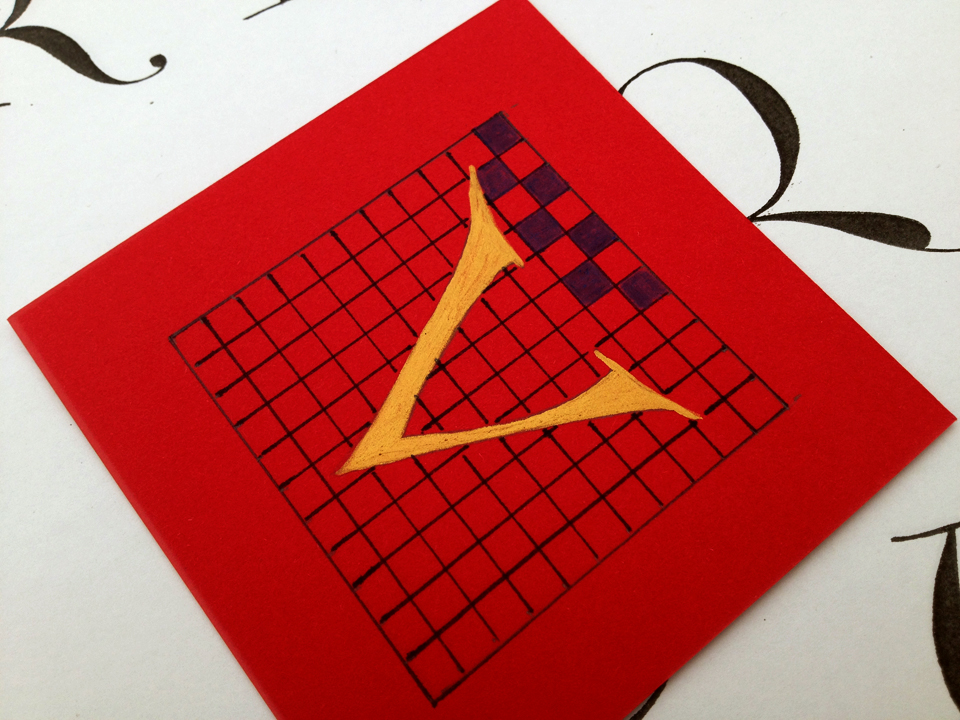
Next, using your ruler and black ink, measure every 1/2 centimetre along the top and bottom, and sides and flip your ruler upside down, (so the flat edge is held a little above the card to prevent the ink from smudging), and draw black ink lines in a grid pattern taking care to miss the letter.
Now colour in each alternate square in the grid. Again, because of the time crunch, I used a pencil, but next time I’ll use some paint.
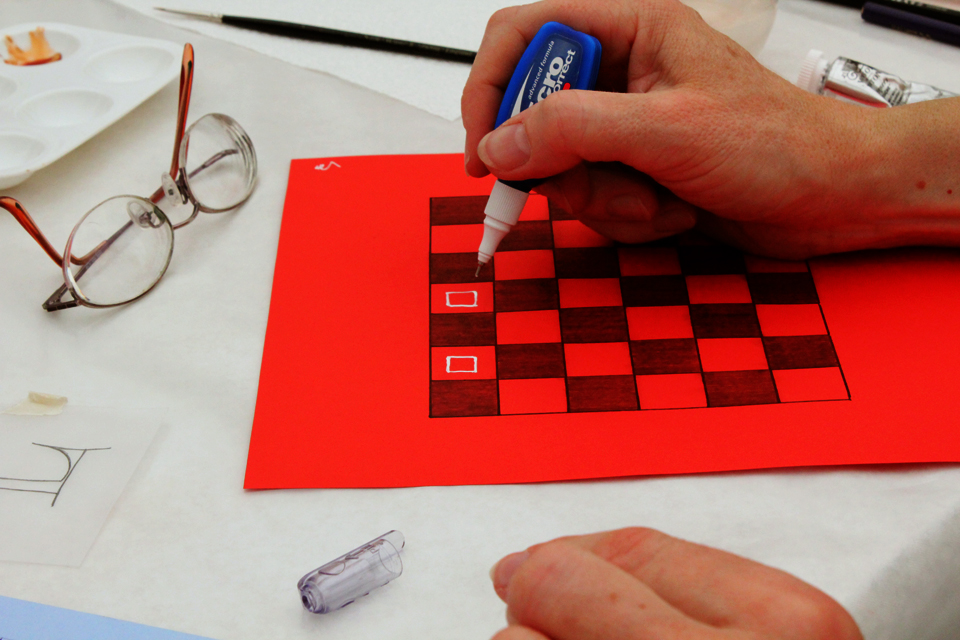
Now get some white paint and a fine brush, and paint squares on each alternate square. Go slowly!!! Here, Helen is demonstrating on a large grid to make it easier. She applied the white to the red squares.
I had a bit of practice on a scrap piece of card and preferred the white on the blue squares.
ARG! I can’t draw precise squares to save my life! This was a lesson in frustration. I joked with the lovely woman beside me that, if I had been a Medieval illustrator, my squares would have literally been the death of me!

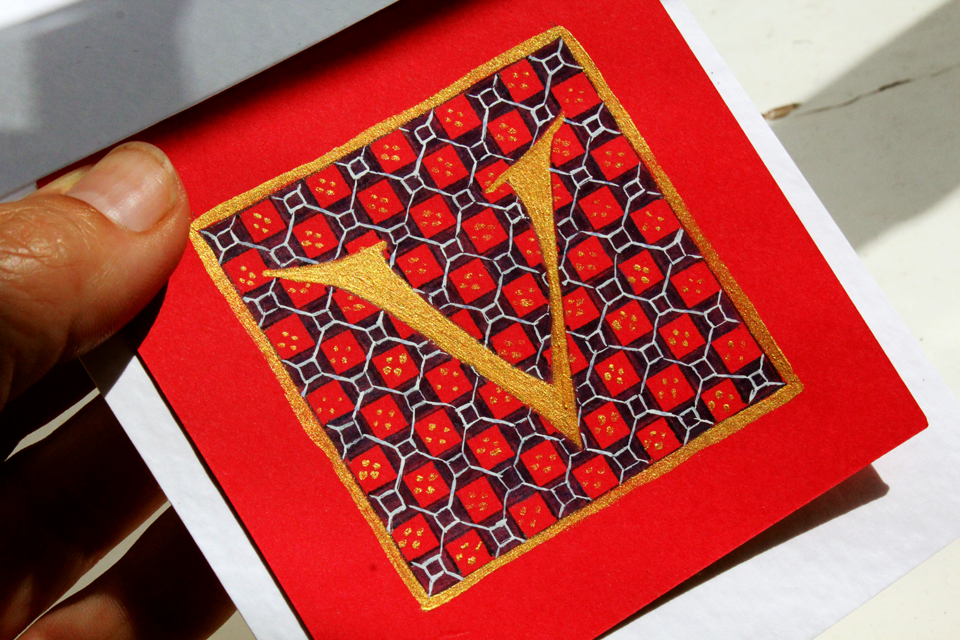
Once the squares are completed, I connected them with lines on the diagonal and used a bit more gold gouache for some dots in the red squares and to do a little golden outlining around the outside of my design.
And look! What do you think? I think it’s such a lovely art form to learn. Now I want to take my time and discover other designs and use gold leaf.
Wouldn’t this lend itself so beautifully to Christmas cards or to one’s own signature on a piece of art? I think so.


Christie
So many wonderful classes! Thanks for sharing them with us!
daryledelstein
that would be lovely on holiday cards … being left-handed meant that in school, in lettering class, i was told to pencil in the letters and then fill them in using the india ink pens from right to left so as not to smear … sigh
michellepond
I love illuminated manuscripts! Thanks so much for sharing this, Veronica. As usual, your piece is striking.
Renee
Oh, this is wonderful, Veronica! Thanks for the instructions! I am going to have to try this. It will look wonderful to start a journal page, a card…
restlessjo
It looks brilliant! I have zero patience or talent for this kind of thing but I do love the end result. Fascinating post. My Monday walk next week has a sculpture of an illuminated manuscript in it, funnily enough 🙂