Practical class: Silk Painting 101
Here we go with the first practical class from art in action. 😀
Have you ever wondered how to paint on silk? Have you ever seen those beautiful silk flags fluttering in the breeze or one of those exquisite silk paintings with the puffy backing and wondered about making one for yourself? Well, read on, because now you’ll be able to.
Painting on silk requires a few special products and a little practice and that’s all there is.
You’ll need special paints. The ones we used were already decanted into the little palette and so I couldn’t photograph the actual paint pot, but I know what they are. They are heat set paints and are called Silkcraft Iron Fixed Silk Paint. They blend like a dream, they rinse and thin with water and act a little like watercolours.
The special solution you need to stop the paints from bleeding together is called Gutta. It comes in a tube with a very thin nozzle for precise application.
The other things you need are:
– a piece of silk…obviously…lol
– a wooden support to pin the silk to, (I suggest going to your local thrift store, buying a tacky .99 cent painting on a wooden support, and tearing the canvas away.)
– and some pins to pin the silk to the wooden support (there are special pins with three sharp prongs that we were using, but I think any thin, sharp pushpin will work.)
– something to act like a palette. This paint is very watery so it has to be in little cup forms.
– a paintbrush or two, a jar of water, a piece of paper and a couple pieces of masking tape.

So, the first thing to do is to pin the silk on the wooden support.
Then take your piece of paper and fold it in such a way that it fits inside the wooden support underneath the silk, then take the paper out. Now you have the paper the precise size of drawing surface.
Now draw something. 🙂 (I had my robin drawing on my cell phone and so decided to replicate something like that. This class was only 1.5 hours, but you can take as long as you like.)
VERY IMPORTANT NOTE!!!
You will follow your drawing with the Gutta and, when you finally get to paint the colours on your silk, everywhere that lines do not meet, that is, everywhere where there is a little gap in the Gutta, the paint will bleed and mix together. So draw your design with that firmly in your mind.
When you have drawn your design, pour out some of the paints into your palette. A little will do, it goes a long way.
Now flip the wooden support with the silk pinned to it upside down and put your drawing underneath your silk. You will be able to see the design thru the silk. Hold the paper there with a couple pieces of masking tape.
Now flip the silk right side up and take your Gutta and trace the lines on your silk with the Gutta. You may like to have a little practice on a darker sheet of paper first, (newspaper, paper bag, your kid’s construction paper), to get the hang of how the Gutta flows.
You can see in my robin design, I intentionally left a space on the right side of the robin’s red breast area. I wanted to denote the red part, but wanted the colour to blend and bleed thru.

Now you’re ready to paint your design.
I found that the paint colours were a little sharp for my liking. I mean, fuchsia, turquoise, minty green. lemon yellow…etc…, so I mixed them together to make softer colours and browns and oranges. I had a little practice on my sheet of paper.

Now be brave!!!
What you need is loads of wet paint and dabs with the brush. For the robin’s red breast I used some red and yellow, and, while they were wet, they blended beautifully.
For his wings and tail, I mixed up a load of brown and, while it was wet, I added some blue.
For the background I mixed up a load of blue, (that wasn’t turquoise or midnight blue) and sloshed it on with the biggest brush there was. You can see how the brush wasn’t big enough for the blue sky and how it dried patchy.
But wait! Here’s a trick: SALT
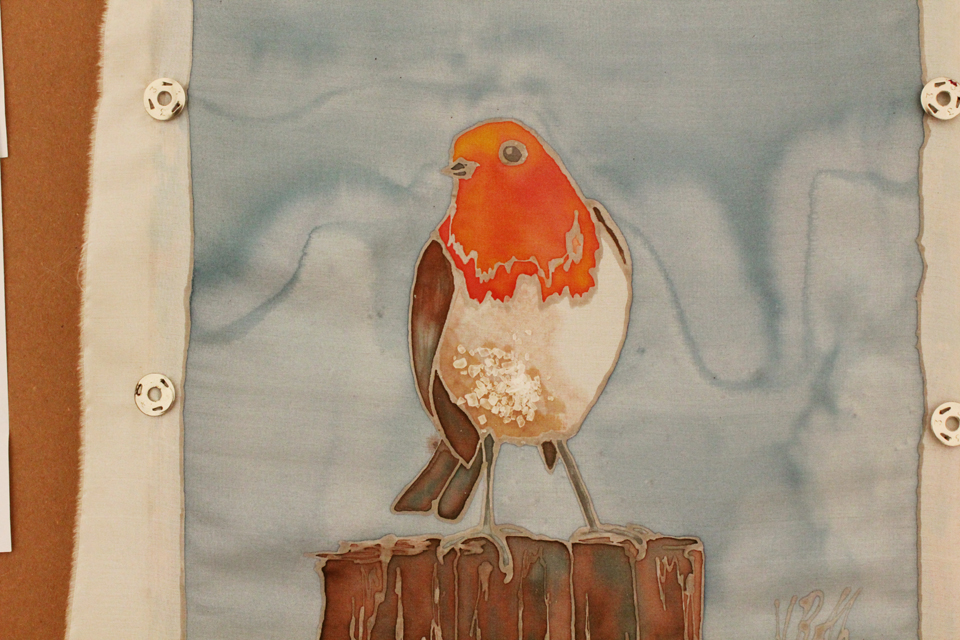
I wasn’t sure how to describe the feathers on his breast. I wanted a dappled effect of soft brown and white. Our instructor, Julie, suggested I sprinkle salt on the area I want to disturb the paint. I used pickling salt, you know, larger crystals, but you can also use table salt. I presume it would give a bit of a different mottling effect. The best way to add the salt is to dump a generous amount on your work surface and then pick it up in your fingers and place it where you want it. The salt absorbs some of the paint causing a lovely mottled effect.
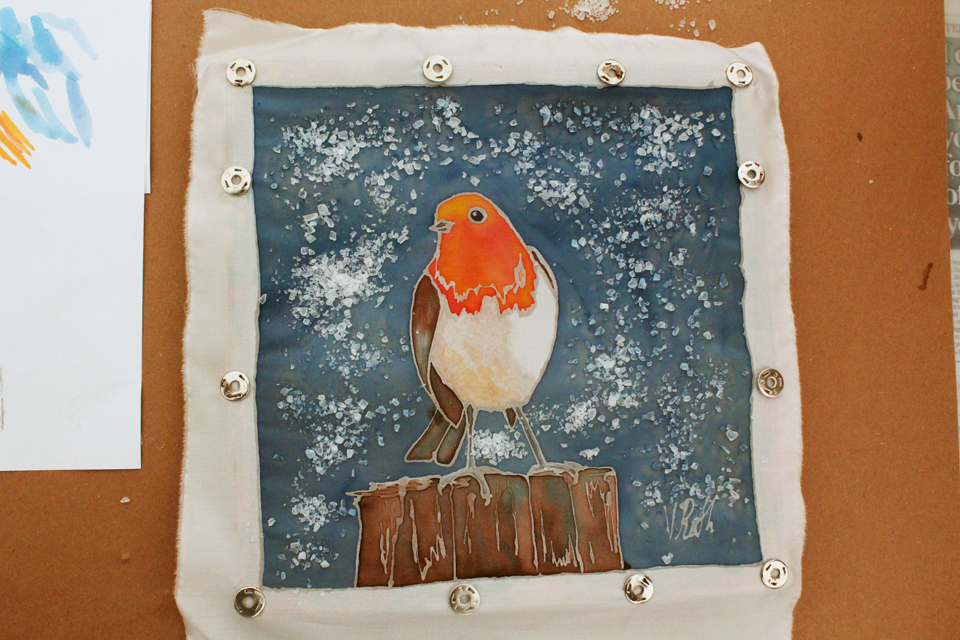
I did the same thing with a second layer of blue on the sky background.
You have to wait till the paint dries and then shake the salt off.
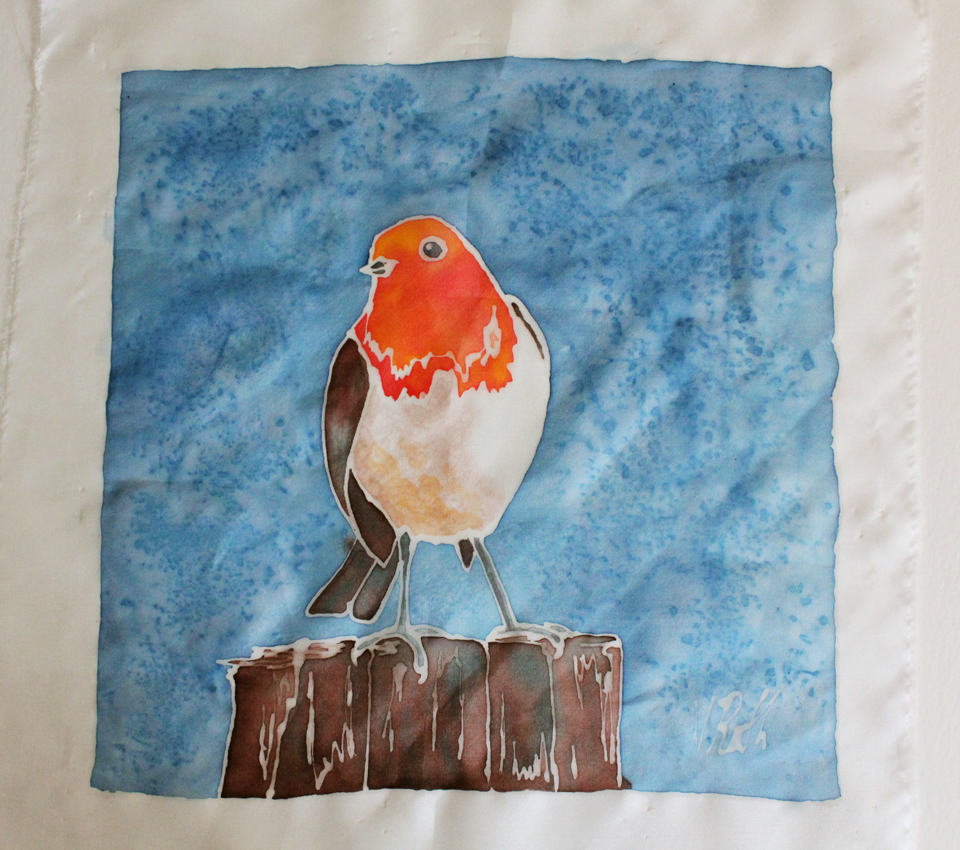
And, TAH DA! Here is my finished little silk painting. I love it and can’t wait to frame it. 😀 (Also, can’t wait to buy some supplies and paint some more.) This is the company I’m likely to order from here in the UK, but I’m sure that very similar products can be found all over the world.
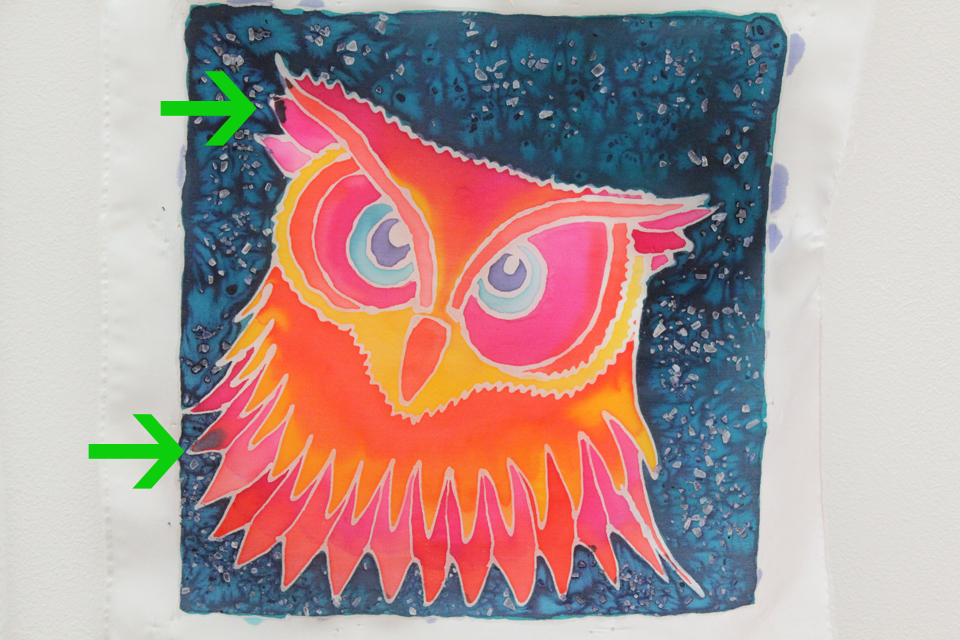
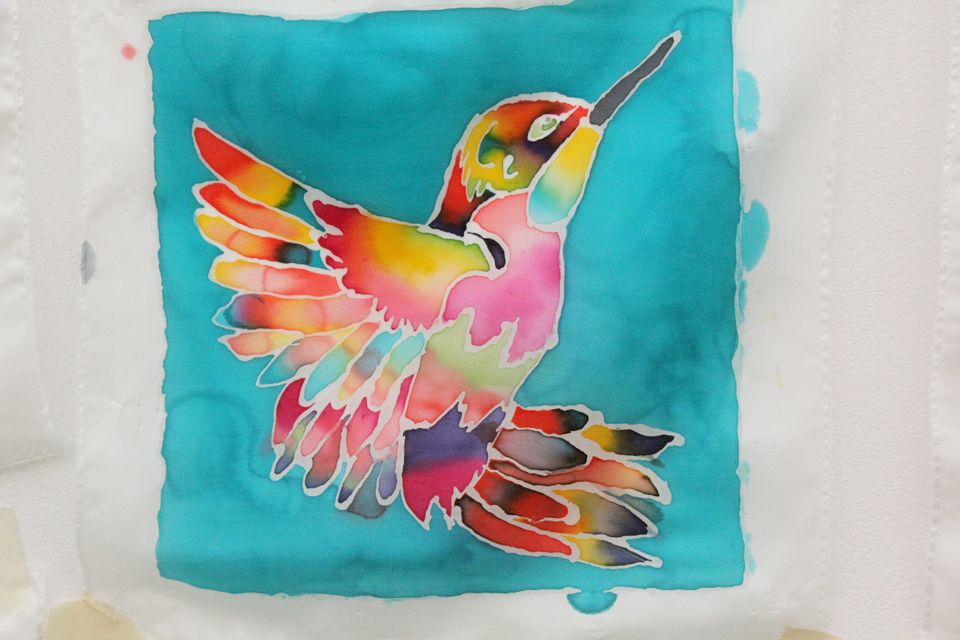
Here are a couple of designs Julie had as inspiration:
I’ve added the green arrows to show you how the paints will bleed into each other if the Gutta isn’t completely sealing the spaces.
However, you can always do a crazy, zany design like this lovely one, and then it doesn’t matter so much at all. 😀
Happy silk painting.


daryledelstein
i see scarves in your future and flags waving in the garden of your house in BC …
Veronica
There just might be a certain degree of silk flagness happening. 😀
Christie
what a great class/tutorial – love your robin
Veronica
Thanks so much Christie. Are you going to give it a try? I bet you’d do a wonderful painting. 😀
vastlycurious.com
Wonderful! It turned out just great!
Veronica
I think it did too. Loved the process. Now I want to order paints and silk…but wait, want more lino for lino cuts and chisels for wood carving first…lol. 😀
vastlycurious.com
Wood carving is what I am really looking forward to seeing!
Patty/NS
Beautiful work! Something to add to your Etsy store? I hope so…..
Veronica
Oh Patty, thank you so much for the vote of confidence. 😀 I do intend to get better at it first. When I looked up google images for silk paintings…my oh my!
Pamela Smyk Cleary (PSC)
Beautiful, Veronica! And you make it seem so simple that a non-artist could do it. (Hah!) Your results are GORGEOUS, and yes, this process would make lovely clothing also. Silk scarves sound like a wonderful idea to me! 🙂